Visual Studio 2015 and .NET 4.6 Released (and more!)

VS2015

Big release day today! Microsoft today announced the release of Visual Studio 2015, Visual Studio 2013 Update 5, TFS 2013 Update 5, .NET 4.6

Check out the blog posts below for more details on what’s new in the release.

The Visual Studio Bloghttp://blogs.msdn.com/b/visualstudio/archive/2015/07/20/visual-studio-2015-and-visual-studio-2013-update-5-released.aspx

Soma’s blog posthttp://blogs.msdn.com/b/somasegar/archive/2015/07/20/visual-studio-2015-and-net-4-6-available-for-download.aspx

ScottGu’s Bloghttp://weblogs.asp.net/scottgu/released-today-visual-studio-2015-asp-net-4-6-asp-net-5-ef-7-previews

.NET Blog – Announcing .NET 4.6http://blogs.msdn.com/b/dotnet/archive/2015/07/20/announcing-net-framework-4-6.aspx

Note that one big guy missing from the list is TFS 2015, it’s still in RC2 and will be RTM’ed very soon.

Take the tools out for a spin and if you have any feedbacks or suggestions send them across using Send-a-Smile, User Voice or the Visual Studio Connect Site

Using SonarQube IntelliJ plugin for Code Analysis

SonarQube provides a plugin for IntelliJ (and Eclipse as well) which is a great tool to perform dev-box code analysis before committing or checking-in your changes. It gives the developers a chance to check and make sure they aren’t introducing any new defects or technical debt in the code they have added or modified. Here’s how to set up the plugin and get going.

Install SonarQube IntelliJ Plugin

  • Launch IntelliJ and go to File -> Settings -> Plugins
  • Search for ‘sonarqube’ and install the plugin

clip_image001

Setting up SonarQube plugin

  • In IntelliJ go to File -> Settings -> Other Settings -> SonarQube
  • Add details about the sonar server here. The plugin will use this to download the quality profile/analyzers etc.
  • This plugin executes the analysis in preview mode where no data is pushed to the server.

image

Associate your IntelliJ project with Sonar project

  • Right click on the project in IntelliJ and select "Associate with SonarQube…"
  • Search for the sonar project and select it

image

Running the analysis

  • Make your code changes
  • Right click on the project and select Analyze -> Run Inspection by Name…

clip_image001[8]

  • In the search box type "Sonarqube" and select "SonarQube Issue" from the result list
  • In the "Inspection Scope" dialog, select Custom Scope and set its value to Changed Files. This will ensure that the analysis is run on the files modified by you.

clip_image002

clip_image003

  • The plugin will run the preview analysis and display the results in the inspection tab. The inspection shows issues in two files which were modified before the analysis.

clip_image004

Branch Policies in Visual Studio Online

Branch policies in VSO allow you to set certain rules against branches in your Visual Studio Online git repos. They are more or less like gated check-ins which TFS has had since forever. Visual Studio Online supports the below policies by default:

  • Changes must be submitted to a branch only via Pull Requests
  • A build must complete successfully before changes can be merged to the destination branch
  • Add certain reviewers if the pull request modifies files in certain paths in the repo

To know more details on the complete workflow involving pull requests on visual studio online, check this excellent post http://blogs.msdn.com/b/visualstudioalm/archive/2014/06/10/git-pull-request-visual-studio-online.aspx

Setting up branch policies

To setup branch policies login to your visual studio online account and navigate to the team project, which has the git repo you want to set the policy on. You will need to have administrator privileges on the team project to setup the policy. After you’ve navigated to your team project, click on the settings wheel icon on the top right corner, this will take you to the admin panel of your team project. Select the ‘version control’ tab, and on the left rail select the branch you want to set the policy on (master branch in my case), and click on ‘branch policies’ tab. Refer the figure below, the click points are highlighted in yellow.

image 
 

Under ‘Automatically build pull requests’, select both check boxes. You will need to provide a build definition here which VSO will queue every time a pull request is submitted or updated with a new commit. The second check box, ‘Block the merge’, is actually optional, if you want to allow the merge even on build break, you can uncheck this. Though I’m not sure why you’d want to do that.

The next section, ‘Code review requirements’, allows you to control how changes can be submitted to master branch. The first check box, ‘Require code reviews using pull request’, ensures that any changes to master happen only via pull requests and no one is able to push their changes directly to master. ‘Allow users to approve their own changes’, allows to you add yourself as one of the reviewers and approve the changes, which is nuts really :-)

The last option, ‘Add a new path’, enables you to add reviewers optionally depending on the files involved in the commits. For scenarios where you really want Dave C to look at the changes if anyone modifies files under \kernel\base. It has support for wild chars as well.

After the policies are set, when someone tries to push their changes directly to master, they see this:

image

image

So what you need to do now, is move your changes to a feature branch, push that branch to server and create a pull request to merge the changes to master. This workflow is explained in the link shared above.

Now let’s say, the feature branch was pushed and a pull request was created, but the change list has a silly syntax error. You will see the branch policies show up in the right rail and a build will be queued for verification.

image

image

Since the pull request had a syntax error, the build will fail and attempting to merge the changes to master will be blocked.

image

image

The next step is to fix the build failure, add a commit to the pull request and make sure you have at least one approval from reviewers. As soon as you push your local branch to server, a new build will be queued automatically and the status updated.

image

To enhance this even further, you can improve your build definition by, let’s say, adding a unit test build step and a code analysis build step, to ensure that all unit tests pass, before the pull request can be accepted and merged into master.

Setting up an on premise build agent with Visual Studio Online

In this post we’ll look at how to configure an on-premise build agent to work with your visual studio online account. If you haven’t given Visual Studio Online a try yet, I suggest you head over to https://www.visualstudio.com/, sign-in using your Microsoft account, create a free VSO account and take it for a spin! If you’re new to VSO, these channel9 videos should help get you up to speed.

Create a team project and add sample code

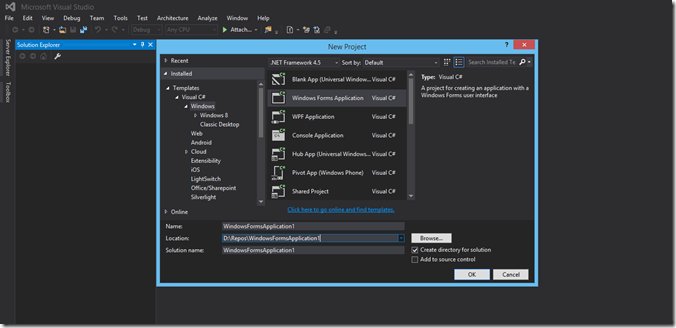
For our purposes here, we’ll create a new team project and add a simple Windows Forms application to it and set up the build agent to build this project. After you log into VSO, select the ‘new’ link from under ‘Recent projects and teams’ section to create a new team project. I selected Agile process template and git as the underlying version control, but these aren’t necessary for our discussion here, you can try out other combinations as well.

image

Navigate to the newly created team project and select ‘Open with Visual Studio’. This should launch Visual Studio and might ask you for credentials to connect to VSO. Clone the repository and add a new solution to the repo, commit the changes and push them to the server. The project should now show up in the VSO portal.

image


Configuring the build agent

For the demo here, I’ll be using my trusty Lenovo ThinkPad as the build agent. Log into your VSO account and select the gear icon on top right of the screen to go into your account settings. Click on ‘Control Panel’ and select ‘Agent Pools’. image

Click on ‘Download agent’ to download the VSO agent binaries and the scripts to configure the agent. Save agent.zip to your favorite location on the disk and extract it (for e.g. to c:\agent). You might need to unblock the zip file before extracting it, just right click on the zip file, select properties and check the ‘unblock’ box. The zip file contains the binaries for the build agent and also a powershell script, ConfigureAgent.ps1, which will help you setup the machine as a build agent.

image

Open a powershell prompt and navigate to c:\agent and run ConfigureAgent.ps1. This will launch a command prompt window and ask you details about the agent, here’s what to select:

Name for this agent: leave as default or give a fancy name

URL for the Team Foundation Server: your VSO account URL (in my case this was https://pkumalive.visualstudio.com)

Configure this agent against which agent pool?: default

Work folder path: leave as default

Install the agent as Windows Service: Y

image

Your build agent is now setup and if you go to the account settings and refresh the agent pool, you should see the new agent listed under the default pool.

image

And that’s it! The build agent is now ready, we just need to create a build definition which will use this agent to build our project.

Note: The last step in the build agent setup, install as windows service, is optional. But I couldn’t get the project to build if the agent isn’t installed as a windows service. I will investigate this and update later.

Create a build definition

Go to the Build tab of your team project and click on + to create a new build definition. You can start from an empty build definition; add the ‘MSBuild’ task to the definition, browse and select the solution you want to build.

image

Under the ‘general’ tab, choose the default queue. Remember this is what we used while creating the build agent.

image

Give the build definition a name and save it. Select ‘Queue build…” after this to trigger a build. Within few seconds you should see the build being run. If you want to publish the build artifacts to a file share or any other location, you can add another task to the build definition ‘Publish build artifacts’, and set it up accordingly.

image